Almost every dead solar light has one of two problems: it is not collecting energy, or it is not releasing it. One test that takes sixty seconds tells you which, and from there you are two steps from the answer. Run the checks below in the order given. Jumping ahead is how people end up buying batteries for a light whose switch was off.
The ten-minute fault finder
No tools, no multimeter. Do steps 1 through 6 in daylight.
- Confirm the switch is actually on. (10 seconds) It hides on the underside of the head, inside the battery hatch, or behind a rubber plug. Many are stiff enough that a half-press leaves the contact between positions, and three-position switches read OFF / ON / FLASH, where the middle detent is not always ON. Press until it clicks. Then go to step 2 whatever happens, because nothing should light in daylight even if the switch was the entire problem. We cover what that switch disconnects in why solar lights have an on/off switch.
- Pull the battery isolator tab. (30 seconds, new lights only) Open the battery compartment and look for a thin plastic strip between the cell and the metal spring. It is frequently clear rather than the red flag you are expecting, and on spot lights it often sits under a hatch held by a Phillips screw, so people who never opened the case never saw it. Pull it, reseat the cell, close up, go to step 7.
- Run the blackout test. This is the fork. (1 minute) Cover the panel completely with your palm, edges included, or carry the light into a closet and shut the door. Wait 30 seconds; some drivers pause before switching over.
- It lights. The LED, the boost driver, the dusk detection and at least some stored charge are all fine. Your fault is on the charging side. Go to step 5.
- Nothing, or a brief flicker that dies. Go to step 4.
- Swap in a known-good cell. (2 minutes) Take the battery out of a light that is working, drop it into the dead one, and repeat the blackout test. This one swap separates a dead battery from dead electronics without any test gear.
- It lights now. The battery is your fault. Replace it, about $2.50, and you are done.
- Still nothing. Go to step 6.
- Audit the charging side. (3 minutes) The light works but is not being fed. Check three things in this order. First, shade: stand at the light at 10 a.m., noon and 3 p.m. and look for shadow crossing the panel. Trees, fence shadows and the sun’s seasonal drop all move, so a spot that worked in July can be in shade by October. Second, film on the panel: wipe it with a damp cloth and look at the cloth. Third, the plastic itself, which is a separate problem covered below.
- Look for water and corrosion. (2 minutes) Open the case. Standing water, a white or green crust on the battery springs, or a tide mark inside the lens all mean the seal has failed. Scrape the springs bright with a fingernail file and retry step 4. If the corrosion has spread to the circuit board rather than the springs, the light is finished.
- Give it three full sunny days, then retest. A flat 600 mAh cell on a typical garden-light panel delivering around 40 mA needs roughly two and a half days of good sun to fill. Until you have given it that, a light that failed the blackout test has not proved anything.
What each outcome means
| Where you landed | Cause | Fix | Cost | Worth it? |
|---|---|---|---|---|
| Lit after the switch clicked | Switch off or mid-detent | None | $0 | Yes |
| Found an isolator tab | Never commissioned | Pull tab, charge 3 days | $0 | Yes |
| Lit on a borrowed cell | Worn or dead battery | New AA or AAA NiMH | ~$2.50 | Yes |
| Lit in the closet, dies in an hour | Battery holding partial charge, or too little sun | New cell, or move the light | $0–$2.50 | Yes |
| Lit in the closet, shade on the panel | Sited wrong | Relocate | $0 | Yes |
| Panel yellowed, cloudy or crazed | UV damage to the plastic | Wet-sand and clearcoat, or replace | $0–$8 | Sometimes |
| Water inside, springs corroded | Failed gasket | Dry, clean springs, reseal | $0 | Sometimes |
| Water inside, board corroded | Failed gasket | None | — | No |
| Nothing on a known-good cell, dry inside | Driver chip, LED or panel open circuit | None practical | — | No |
Which causes actually happen most
Nobody publishes real failure-mode data for garden solar lights, and you should distrust anyone who implies they do. The “over 60% of solar light failures are battery issues” line now circulating through AI search answers traces to a single retailer blog post with no study, sample or method behind it, and Google’s own AI Overview currently credits that number to a different retailer’s page that does not contain it. Treat it as folklore.
What can be reasoned about is age, and age predicts the fault better than any single cause does.
| Age of the light | Check in this order |
|---|---|
| Out of the box, first week | Isolator tab, switch, then three days of charging before you judge it |
| One season to three years | Battery, then shade that crept in since you sited it, then film on the panel |
| Three years and older | Battery, then yellowed panel plastic, then water ingress |
| Worked last night, dead tonight | Switch knocked, panel covered by a leaf or mower clippings, or a run of dull days |
| One light out of a set of six | That unit’s own battery or seal — the set shares nothing electrically |
Why the battery is the answer so often
A garden light runs one full charge and discharge every 24 hours, so 365 cycles a year. Energizer’s own NiMH application manual puts the ceiling at “up to one thousand cycles” and only under ideal, controlled conditions, with a general expected life of two to five years.
A solar light offers neither ideal nor controlled. Once the cell fills on a sunny afternoon, the panel keeps pushing current into it with no charge termination of any kind. Energizer recommends a maintenance trickle below C/40, which is 7.5 mA into a 300 mAh cell. A garden-light panel delivers around 40 mA, more than five times that rate, for whatever is left of the afternoon. Energizer names overcharge exposure as the single biggest controllable factor in NiMH life.
That is the whole story of the light that “only lasted one summer.” The fixture is fine. The cell was cooked by its own charger. A replacement AA or AAA NiMH of the same nominal capacity costs a couple of dollars and buys another year or two, and no, a bigger one will not buy you more hours — though it can buy you more years, which we work through in can I use a higher mAh battery in solar lights.
Two temperature effects compound it, and both cut against the usual advice. NiMH charge acceptance starts falling once the cell is warmer than about 68 °F, so a black plastic head baking on a Southern California patio in August charges worse than the same light did in May. And below freezing the cell cannot deliver its rated capacity, which is why lights that ran past midnight in September quit by 9 p.m. in January.
On most lights there is no separate sensor to replace
Open a typical stake or pathway light and you find one inductor, one battery and an eight-cent driver chip, usually a QX5252F or a YX8018. In the common wiring, the solar panel is the dusk sensor: the chip watches the panel’s own voltage and switches the LED on when it collapses. There is no photocell, no lux sensor, nothing to clean or swap.
So advice to “clean or replace the light sensor” is, on these lights, advice about a part that does not exist. It also explains a symptom that confuses people: a panel that is filthy, hazed or shaded can make a light switch on at noon, because the chip cannot tell a dark panel from dusk. Fixtures that do carry a separate photocell or PIR module, usually larger wall and shed lights, are a different repair, covered in how to fix a solar light sensor.
How much a dirty panel really costs you
Less than you have been told, which matters because cleaning is where most people stop looking. The widely repeated claim that grime cuts output by 50 to 70 percent has no measurement behind it. NREL and Sandia’s operations and maintenance guide puts annual soiling losses on real photovoltaic installations at 4.3 to 7.5 percent, with roughly 0.05 percent of output lost per day between rainfalls.
Garden lights do lose more than a utility array, for reasons that are specific rather than vague. Their panels sit nearly flat and inches off the ground, so they collect mud splash, mower clippings and pollen that a tilted rooftop module sheds. Their handful of cells are wired in series, so one leaf over a quarter of the panel throttles the whole string rather than a quarter of it. Opaque debris sitting in one place is a genuine problem. An even film of dust is not.
Clean it anyway, because it takes thirty seconds and rules one thing out. But if a wipe did not fix it, move down the list instead of scrubbing harder. Method in how to clean the solar panel on garden lights.
Three myths worth dropping
- “New batteries need conditioning.” They do not. The phrase appears in no technical document from Energizer, Panasonic, Duracell or VARTA. What a new light genuinely needs is charge: roughly two and a half days of sun to fill a flat cell from a 40 mA panel. Call it three days before you conclude anything is wrong.
- “Clear nail polish fixes a cloudy panel.” It works for a few weeks by filling micro-scratches, then yellows and flakes under the same UV that hazed the panel in the first place. If the plastic is the problem, wet-sand it and apply a UV-stable clearcoat, or replace the head. Detail in cleaning yellowed plastic on solar lights.
- “There is a reset.” Almost no garden light has one. What people mean by resetting is real, though: pull the battery for ten minutes. On driver chips with over-discharge lockout, that clears the latched state and forces a fresh charge cycle.
When to stop spending time on it
Stop when a known-good, fully charged cell in a dry case produces nothing in the dark. At that point the driver chip, the LED or the panel is open circuit, and none of those is economic to diagnose or replace on a fixture that cost $15 to $30. Stop as well when corrosion has reached the circuit board rather than just the battery springs. Electrolyte creep does not clean off, and the light will fail again within weeks.
Everything above that line is worth ten minutes. A battery is $2.50, a relocation is free, a pull tab is thirty seconds. If you are replacing rather than repairing, the fixtures that survive longest here are the ones with a gasketed head and a user-replaceable AA cell, which is how we spec our solar pathway lights and solar spot lights.
If your symptom is more specific
- Brand-new solar lights not working — the out-of-the-box checks, including tabs, shipping discharge and what to ask a seller before you return anything.
- How to fix a solar light sensor — for the larger fixtures that really do have a separate photocell or PIR module.
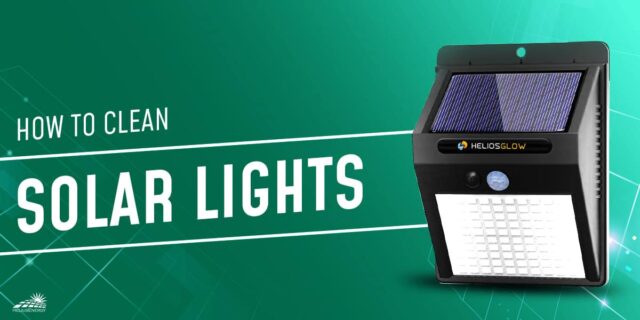
- How to clean solar lights — the full method, what should never touch the plastic, and when cleaning cannot help.
- Do solar lights need batteries — which chemistry and capacity to buy, and why an alkaline in a solar light ruins the fixture.
- Charging solar lights without sun — measured lux, current and charge times for every alternative light source people suggest.
- Do solar lights need direct sunlight — how much charge you actually get in open shade and under overcast.
- How long solar lights stay on at night — the runtime math, by season and fixture type.
- Making solar garden lights brighter — for lights that work but are dimmer than you hoped.
- How long solar lights last — realistic fixture and battery lifespans, before you decide yours died early.
Sources
- Energizer - Nickel Metal Hydride Handbook and Application Manual data.energizer.com Up to 1,000 cycles only under ideal controlled conditions; two to five years expected life; maintenance trickle below C/40; overcharge exposure as the controlling life factor; charge acceptance falling above 68F
- NREL / Sandia / SunSpec - Best Practices for Operation and Maintenance of Photovoltaic and Energy Storage Systems, 3rd Edition osti.gov Annual soiling losses of 4.3-7.5%, and about 0.05% of output lost per day between rainfalls - the basis for rejecting the 50-70% claim in circulation
- QX5252 solar LED driver datasheet opengreenenergy.com 0.9-1.5V single-cell operation, integrated light-control switch and over-discharge protection - and that the driver is controlled by the solar panel itself, so there is no separate sensor
- YX8018 solar lawn lamp controller datasheet asset.conrad.com Charging control, boost drive and optical control on one chip, wired with no photocell anywhere in the circuit
- Today's Homeowner - How to get your solar lights working again todayshomeowner.com US replacement costs of $15-30 per fixture and under $10 per battery pack
- Flyachilles Lighting - Why are my solar lights not working flyachilles.com The origin of the uncited 'over 60% of solar light failures are battery issues' figure now repeated by AI search answers
- Intelamp - Why solar lights stop working intelamp.com The 'dirty panels reduce efficiency by 50-70%' claim this article corrects
- The Solar Centre - Solar lights not working: the ultimate guide thesolarcentre.co.uk The most-cited page in the niche: sixteen steps in no diagnostic order, written for UK conditions
Questions people ask
How do I get my solar lights to work again?
Work in this order: flip the switch and confirm it clicks, pull the plastic isolator tab if the light is new, then cover the panel with your palm for thirty seconds. If it lights, the fixture is fine and the problem is charging - shade, dirt or a tired battery. If it stays dark, swap in a charged cell from a working light. That single swap tells you whether to spend $2.50 or throw it out.
What causes solar-powered lights to stop working?
On a light one to three years old, almost always the rechargeable cell. It gets cycled 365 times a year and then trickle-charged all afternoon at roughly five times the rate battery makers recommend, so it wears out long before the LED or the electronics do. On a brand-new light it is usually the isolator tab or the switch. On an old light it is a hazed panel or water that has got past the gasket.
How do you reset a solar light?
Most garden lights have no reset button, whatever the instructions imply. The useful equivalent is to switch the light off, remove the battery for ten minutes, refit it and leave the light in full sun for a day. On driver chips with over-discharge lockout, that clears a latched low-voltage state. If a light has a recessed reset pinhole, use it, but it does the same thing.
How do I test if a solar light is working?
Cover the solar panel completely with your hand in daylight, or take the light into a closet and close the door. Wait thirty seconds, because some drivers delay before switching on. If the LED comes on, the LED, the driver, the dusk detection and the battery all work, so the fault is on the charging side. If nothing happens, try a known-charged battery from another light before concluding anything.
Why are my solar lights not working with new batteries?
Three usual reasons. The new cells came flat, as NiMH usually do, and need two to three days of sun to fill from a 40 mA panel. Or the cells are alkaline, which solar lights cannot recharge and which can leak and destroy the fixture. Or the fault was never the battery, in which case the blackout test with a known-good cell will still come back dark and the light is finished.
Why did my solar lights stop working in winter?
Both ends of the cycle get squeezed. Shorter days and a low sun give the panel far fewer usable hours, and shadows from fences and bare trees fall across spots that were clear in July. At the same time, NiMH cells cannot deliver their rated capacity below freezing. The light is not broken. Move it to the clearest patch you have and expect shorter runtimes until spring.
How long do outdoor solar lights usually last?
The fixture commonly lasts five to ten years; the battery inside it lasts one to three. That mismatch is why so many lights seem to die after a season or two. Budget for a $2.50 cell roughly every other year, treat a yellowed panel as the next wear item after that, and judge the fixture itself only once a known-good battery has failed to revive it.